How to prepare a new website for Google crawling and indexing
Congrats on launching a new website. Now let's make sure that it gets crawled and ranked by Google.
Last updated on
|You've build and launched an amazing new website. Your ultimate goal is for your website to rank on the first page of Google search results. But before we learn how to run, we need to learn how to walk. First, you'd like to make sure that your website is set and ready to be crawled and indexed by Google in order for you to start ranking in its algorithm.
Check if your website is indexed
Don't expect results immediately - it might take up to several days until your site appears on Google. You can see if it's been indexed successfully if you simply Google your website url prefixed with site:
For example:
site:www.seocomponent.com If you can see results, that's great. If not, Google is still in the process of crawling and indexing your website.
Add a robots.txt file
robots.txt is a file that lives in the root folder of your website which instructs web crawlers how they should access your website.
In your root folder, add a new robots.txt file. For example, this is what my robots.txt file looks like:
User-agent: * Allow: / Sitemap: https://www.seocomponent.com/sitemap.xml For the majority of websites, the contents of the above robots file will be sufficient. You can also Disallow pages (or whole directories) if you don't want them to be crawled.
Google has build a nice and simple tool to check the validity of your robots.txt file..
Remove noindex/nofollow meta tag
During development, you might have added the <meta name="robots" content="noindex, nofollow" /> meta tag across your website (in order to remove the ability for crawlers to crawl your website on a staging environment). Ensure to remove it if your pages don't need it anymore.
Create a sitemap
Depending on the technology you are using, the technique of creating a sitemap will be different. You can find guides on how to set up dynamic sitemaps within our PRO dashboard for different languages/frameworks which you could find useful!
Here's an overview of how my sitemap looks like. You can view it on /sitemap.xml
<urlset xmlns="http://www.sitemaps.org/schemas/sitemap/0.9"> <url> <loc>https://www.seocomponent.com/</loc> </url> <url> <loc>https://www.seocomponent.com/blog/</loc> </url> </urlset>Verify that your sitemap is valid
It's always useful to see if your sitemap is valid before you submit it to Google. Thankfully, you can use this free tool to do so.
Google Console
Google console is a free tool which you can use to troubleshoot and check the perfomrance of your website on Google. It's really useful to see things such as Core web vitals performance, clicks/impressions, page coverage, keywords that users find you through and others.
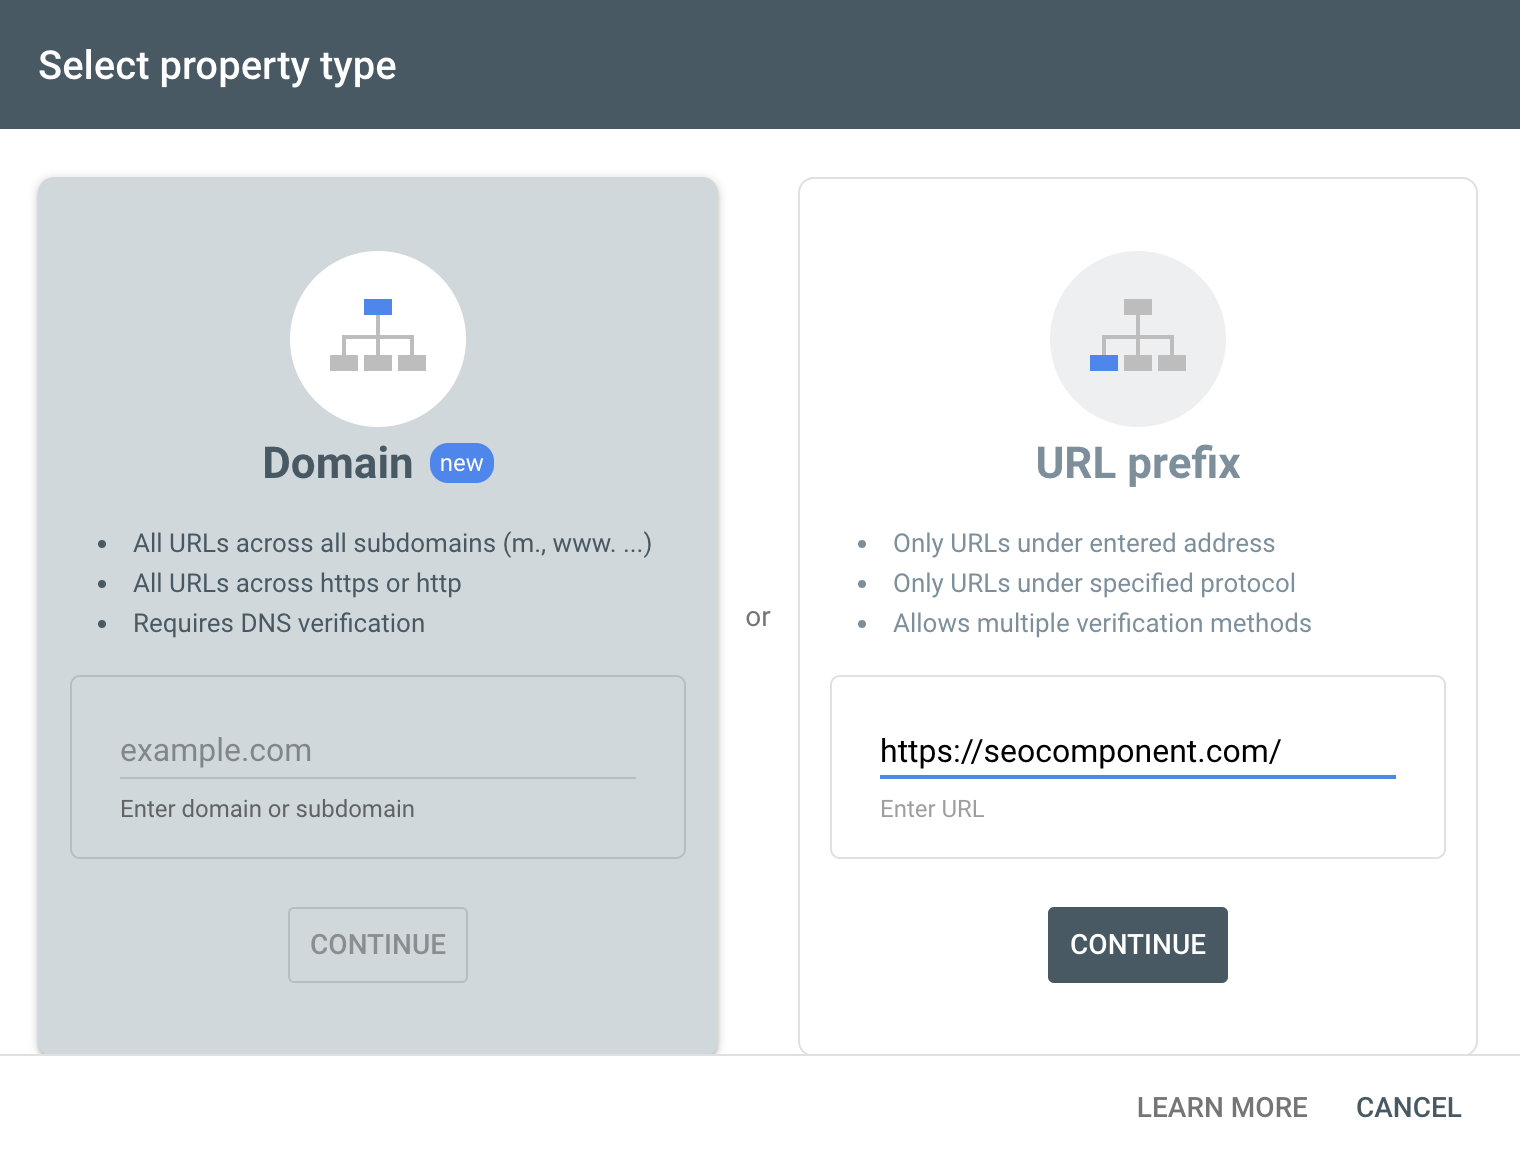
Create a Google Console property
You can create a new property using either the Domain or the URL prefix option. If you don't want to tinker with DNS records, just use the URL prefix option and you can verify using just a meta tag.
On the next page, you'd be given a code which you can paste in your code:
<meta name="google-site-verification" content="your-code" />Push the new commit to production and click and the Verify button. Google should then be able to register it and redirect you to your dashboard.
Submit your sitemap on Google Console
Now that you have access to the Google Console dashboard, let's submit your sitemap.
- Click on Sitemaps in the sidebar menu
- Enter your sitemap path in the Add a new sitemap field
- Click Submit
You might be presented with “Couldn’t fetch” status. Don’t worry about it - it seems that this is a bug and the real status is actually “Pending”. Google has added it to their queue and will be indexed in the coming hours/days.
Use the URL inspection tool
You can use Google Console's URL inspection tool to check if a page is crawlable and to manually submit the page for crawling.
- Click on URL inspection in the sidebar menu
- Input your homepage URL
- Click on TEST LIVE URL button
After several seconds, hopefully you'd see only green ticks.

- Go back to GOOGLE INDEX tab and click on REQUEST INDEXING button. You'd get a message like the following
URL was added to a priority crawl queue. Submitting a page multiple times will not change its queue position or priority.
And you are done. The URL has been added to the Google's queue and should be indexed soon!
Don't forget social media
This is an optional step and it just boosts your changes for your website to be crawled faster. Google looks through social media which means that if it finds your website on it, it makes crawling your website easier.
Create social accounts for your website/product
Your website might not need social accounts, but if it does, it's useful to create social accounts and link your website URL to them.
Share your new website to social media
For example, if you have Twitter account, you can share your homepage and a blog post as some sort of announcement that you have launched a new website.
You can also create a post on Medium or Reddit, which are platforms that high domain authority and can help with ranking your own new website.
And that's about it. Once Google indexes your website, you can start climbing its ranks by building amazing content strategy and executing it well. It's not only about the quality of your content though - you need to ensure that your technical SEO and speed performance is top quality.
All the technical SEO you'd need within our dashboard - just for
SEO component, structured data, favicon setup, sitemap setup and much more in your framework and language.
Learn moreLifetime access for (early bird price)